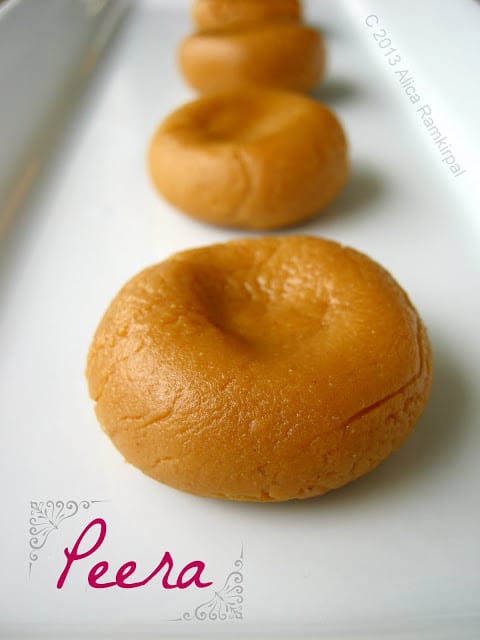
Shivratri is soon approaching and I know this recipe couldn't come at a better time for many of you. Peera/pera is a variation of an Indian milk sweet known as Peda. I say variation, because the version I've seen made in Guyanese homes is different than a traditional Peda recipe. The version I grew up eating consists of evaporated milk and sugar that has been reduced down to a taffy like texture then rolled into balls. It is slightly hard and chewy and once you get it into your mouth and start swirling it around, the milky-sugary flavor and texture just falls apart and takes you over, well it takes me over at least. These little delicacies were typically served in a paper bag alongside other sweets like parsad and mithai after the commencement of a religious ceremony.
When I was a teenager, probably even younger, buying peera at a roti shop wasn't very common. Usually it was available and best enjoyed at religious functions. Nowadays you can buy a pack of peera at a West Indian bakery or roti shop for something like $2.00 for four or five pieces. If purchased, it was usually only to have as a novelty in your pantry as large batches of peera was still made at home for jhandis and poojas. Making peera is such a labor of love. It takes a great deal of attention and requires a lot of time, especially during these functions where there were so many other dishes that had to be cooked and tended to, like the parsad, roath, mithai, and the seven different types of curries that was commonly served after the function was over. Usually there were a lot of hands available to help with the different foods that needed to be prepared so the work always got done. My cousins and I usually helped out with other stuff like washing the dishes and cleaning, but no matter what we were doing, we'd put our chores aside so we could help with making the peera. I have such good memories of us helping to roll the peera because we wanted to be aware of how many pieces were left over for after all the parsad bags were stuffed. I even remember the arguments and fights we had that involved who hid an extra handful of peera in their bedroom because somehow, we never had any peera left over, when we all knew we should have. Ahh those were the good ole' days that have now become memories. I mean we're all adults now and I'm sure we've all managed to control our peera consumption, or maybe we just found better hiding spots, ha!
A CHALLENGE
If you ask anyone who has made peera what the biggest challenge is, they'll tell you it's the turning. Standing in front of the stove turning the mixture constantly so it won't burn is just draining and exhausting is really what they'll say. And it's true, there is a lot of turning and muscle strengthening involved, so be prepared. If there was one tip I could give you to help you achieve a great tasting peera, it's to keep the the heat low and slow after the first hour. It is so important to do this to help prevent scorching. No one wants burnt chunks of sugar in their peera. In addition to keeping the heat low, consistently turning the mixture keeps it from "catching" the bottom of the pot. Unfortunately, the turning is a necessary evil and something you have to do because once your batch as been scorched there's no coming back from it, you'll just have to start over.
The one benefit to all this is using evaporated milk. Evaporated milk has already been concentrated so that means less boiling as compared to starting the process with whole milk. I know back in my grandmother's time, they made peera from cows milk and had to boil it and boil it for hours to reduce. If making peera with concentrated milk is exhausting, can you imagine whole milk? Well neither can I, but my good friend and journalist, Cynthia Nelson can tell you all about it in her detailed post on peera and her adventure with making it from scratch using whole milk, if you're interested (and you should be) take a read here.

You'll need ⅛ teaspoon ground nutmeg and cinnamon, 1 ¼ cup white granulated sugar, and one 12oz tin of evaporated milk.
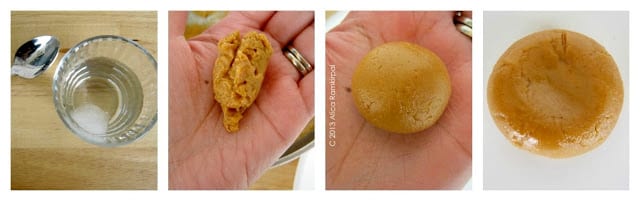
Pour milk, sugar, and spices into a cast iron or stainless steel pot. Give it a stir and heat on medium-low heat for about an hour and fifteen minutes. In the meantime grab a plate or tray to place peera in after it's done, a glass of ice water, and a small spoon, set aside for later.
Let mixture boil for an hour on medium-low heat. Stir every now and then, always making sure to scrape spices down from edges of pot. When the color starts to become golden and the texture becomes like pancake syrup, turn heat to low.
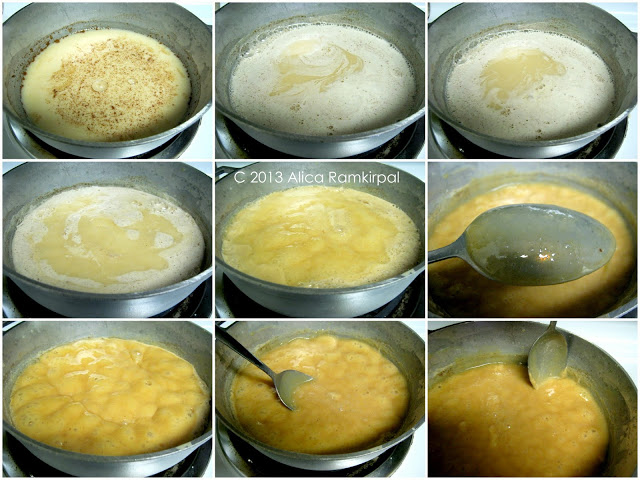
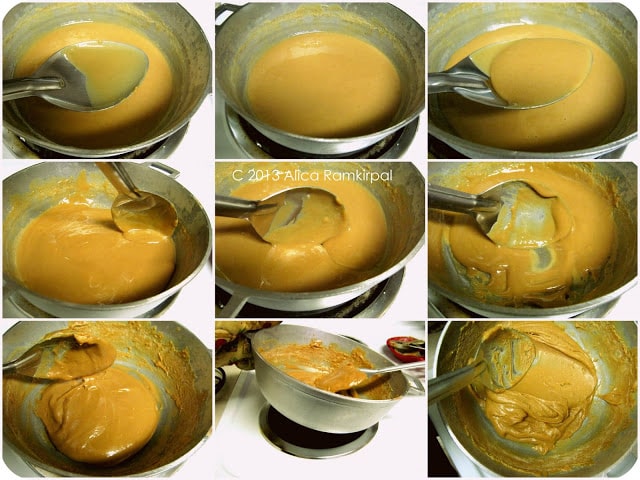
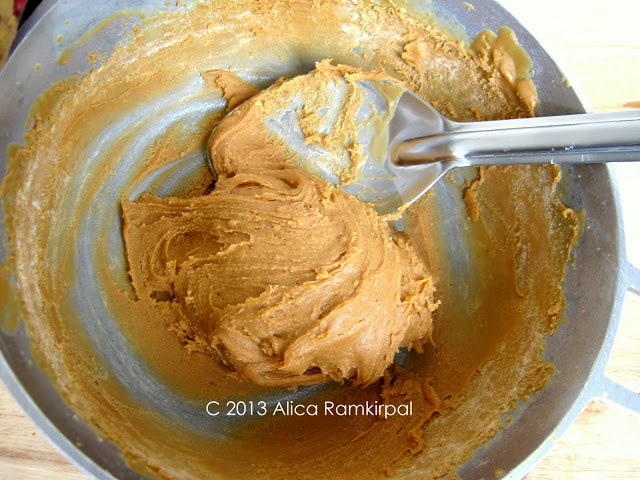
Around an hour and a half mixture should be thick like molasses, keep turning mixture to keep from scorching. Scrape sides down frequently so sugar does not build up. When mixture begins to look thick like cake batter, do not leave the stove, keep turning. The edges of the pot will begin to look dry and white. Remove mixture from heat, tilt the pot and beat mixture until the texture becomes like frosting or taffy.
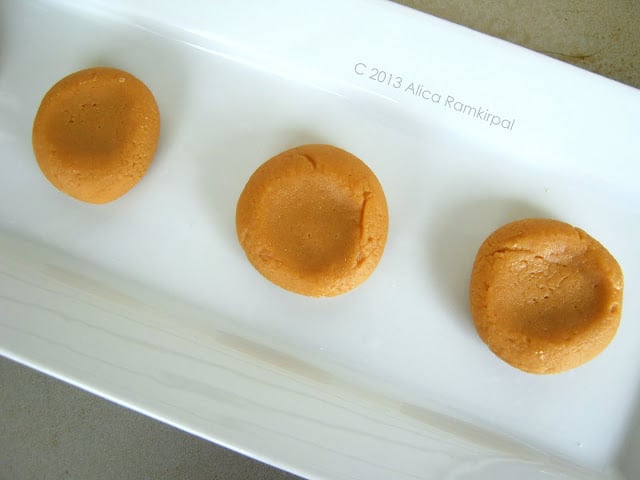
Rub some ice cold water between both palms, roll about a teaspoon of peera mixture to form a ball, place in plate or tray, and press down slightly with your finger to make an indent. The cold water will help to keep your palms from scorching, keep the peera mixture from sticking to your skin, and will also help to make the peera smooth. Let peera dry for an hour or so, then enjoy!
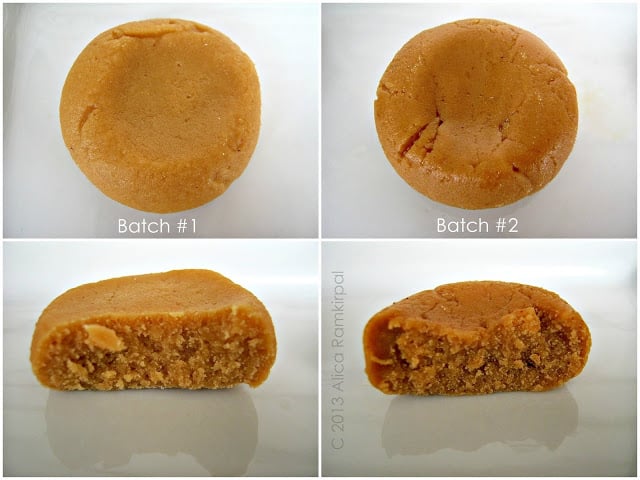
I asked a few friends and family members, including my mom, for their peera recipes. The most common one I received is that of batch #1 - one tin of evaporated milk to one tin of sugar. Batch #2 which is my mom's recipe is slightly different in that she adds spices and a little less sugar. I wanted to test both recipes to see if there was a big difference. The disparity came in the texture and flavor- both which were very good. Here's my breakdown:
Batch #1
- 1 12oz tin evaporated milk
- 1 tin white sugar (using the same evaporated milk tin as a measuring unit- this is actually 1 ¾ cup sugar)`
You'll notice this batch is lighter in color and also smoother. This is due to two reasons: 1. Removing the mixture from the heat earlier and beating it a little longer. 2. Rolling the mixture into balls right away while mixture is still hot. This batch was tasty except, I could taste the sugar granules as I smeared the peera on my tongue once it was set. If this is how you like your peera then by all means, enjoy! Overall, this batch tasted more like the Spanish fudge sold at local NYC bodegas. If you live in a metropolitan area, you may be familiar with this reference. It was certainly as tasty as it looks.
Batch #2
- See recipe below
The second batch is darker in color and also a little bit stiffer. The darker color is a result of keeping the mixture on the stove longer towards the end, allowing the sugar to caramelize more. I prefer this way because the flavor is more pronounced and it is also how I grew up eating peera-slightly on the darker side. You'll also notice the second batch has cracks, this is because once the pot was removed from the heat, the mixture dried too much before being rolled into balls. I had to stop to take photos and unfortunately the peera mixture got a little stiff so when I rolled them, cracks appeared here and there, no biggie.
Both recipes were delicious and worthy of a great peera, if you decide to take on this challenge, remember to be patient (especially if it is your first time) and invite some family or friends over to help take shifts with the turning!
Mom’s Peera (Milk Fudge)
Ingredients
- 1 12oz can evaporated milk
- 1 ¼ cup white granulated sugar
- ⅛ teaspoon ground cinnamon
- ⅛ teaspoon ground nutmeg
- ½ teaspoon vanilla extract (optional)
Instructions
- Set aside a glass of ice water, a small spoon, and a plate or tray to place peera in.
- Pour milk, sugar, and spices into a cast iron pot. Heat on medium-low for about one hour and fifteen minutes uncovered. Let mixture boil, turning occasionally and scraping the sides down each time.
- Mixture should start to look slightly thick, like pancake syrup and have a caramel color. Turn heat to low and turn every 2-3 minutes. Mixture is at most risk for scorching at this point so keep heat on low.
- Around an hour and a half mixture should be thick like molasses, keep turning mixture to keep from scorching. Scrape sides down frequently so sugar does not build up.
- When mixture begins to look thick like cake batter, do not walk away from the stove, keep turning. The edges of the pot will begin to look dry and white. Remove mixture from heat, tilt the pot and beat mixture until the texture becomes like frosting or taffy. It is now ready to be rolled into balls.
- Rub cold water between both palms, use spoon to remove about a teaspoon of peera in between your palms to form a ball, place in plate or tray, and press down slightly with your finger to make an indent.
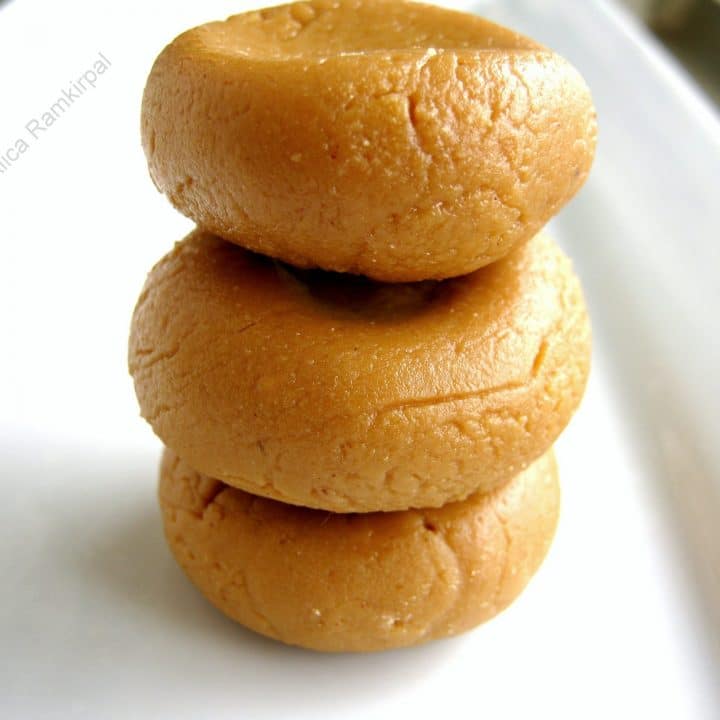
- Allow peera to harden then enjoy.
Notes
I recommend not using a non-stick or enamel coated pot. You will be turning the peera mixture frequently and wouldn't want to risk scratching the bottom of one of these types of vessels or getting the scratched pieces into the peera mixture. A cast iron or stainless steel pot works best for this recipe.
Use a metal or wooden spoon, a plastic spoon may break while beating the mixture.
After an hour of boiling, be absolutely sure to keep heat on low, otherwise the mixture will scorch on the bottom and as you turn it, you'll see the scorched pieces turn up in the milk.
Roll peera while mixture is still hot, it will help to keep the peera smooth and free of cracks. The darker peera in my photos had a few cracks since I had to stop to take photos, so as you can see, even a minute cannot be spared. When the sugar begins to dry, it makes it harder to roll the peera, so work quickly. Don't worry about burning your hands, the cold water will not only help with keeping the peera smooth, it will keep your palms from being scorched.
If you are not sure when to take mixture off the stove, you can drop a little bit of the mixture into a glass of warm water, if it keeps its shape and does not dissolve, it is ready to be removed from the stove and beaten.
Anne F says
This looks similar to Trinidad Ladoo, but the ingredients are totally different we use ground chic peas. Looks yummy!
Paulyne Ramdeo says
Thank you which one more would you find at a jhandi served with prashad?
Alisha says
The one without the spices.
Alica says
Hi Paulyne,
What do you mean? What other sweets are served with parsad?
Maquita Dieufene says
Looks fantastic!
Instead of rolling it in between your palms,
can you spread the mixture on a cookie sheet and let harden then cut into squares?
or will it kill the recipe?
Alica says
Hi Maquita,
You can certainly do that, make sure it's a small baking sheet though so that you can get the thickness of peera. Let me know how it goes :).
Dre Dreamer says
Just did this it came out great . Thanks girl !
Unknown says
What would the option be to make them softer? Have it off the stove earlier?
Vanita Cyril says
Hey girl, best recipe ever. I made batch one Sans the nutmeg because of allergies and it's just perfect. Blessings to you for all your recipes.
Sarah Ramlogan says
Hi there, I love pera do you know how to make it with powder milk?
Sarah Ramlogan says
Hi Alicia, do you have a recipe for pera using powder milk?
Crystal says
Hi Alica, I just made this as a surprise for my dad for Father's day. Very proud to have made it just likenough what he's used to from Guyana -- thanks to your guidance. Thank you so much for that.
Alica says
Hi Crystal,
You're welcome :). What a nice gift. I am so glad to have helped! Hope you both enjoyed Father's day 2017!
Marie Lall says
Hi Alica,
Just a quick question, I have to double the recipe, Do you think a 12"w x 3"d pan will be fine or should I get the 14"w x 3.5"d?
Thank you
Alica says
Should be fine ?
Amanda says
Hi Alica,
For the second step do you heat it covered for the first hour then uncovered for the last 15 mins or is it uncovered for the entire 1 hr and 15 mins?
Alica says
Hi Amanda, we do uncovered for the entire time.